October 25, 2017 by admin
How To Create A Circle Polyorama
Photoshop Tutorial: How To Create A Circle Polyorama
In this tutorial we’re going to make such a polyorama with a bunch of photos. It is pretty basic and works for photoshop CS and over.
Step 1
The first thing you’ll need is a 360 degree panorama. This is made by using a camera on a tripod and shoot. Then rotate the camera a bit and take the next shot until you have images covering 360 degrees or more.

Step 2
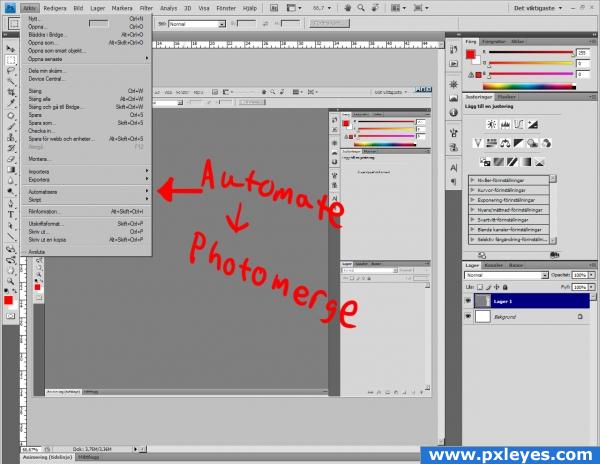
In this step we will use Photoshops built in panorama stitcher, Photomerge.
To open Photomerge go through File-> Automate -> Photomerge.
Step 3
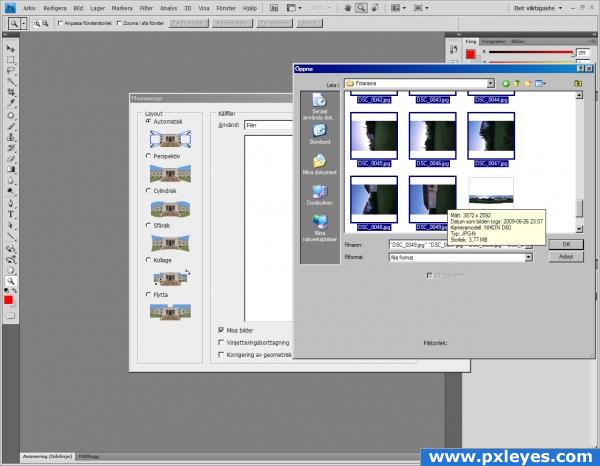
When Photomerge is open choose “browse” and go to the folder your image is in. then select
the first image in the pano, hold shift and press the last one. this selects all the photos between the first and the last image. To deselect one or more images hold CTRL and press the image you want to select/deselect.
Step 4
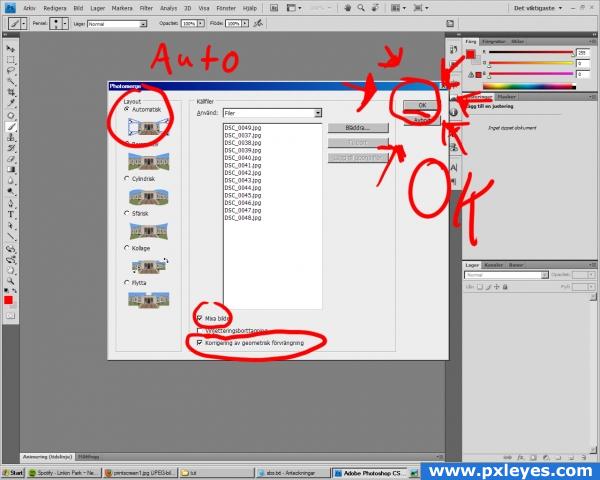
The images will line up in the list ready to be stitched. Check “Auto”, “Mix images” and “Geometric distortion correction”
Then hit “OK”
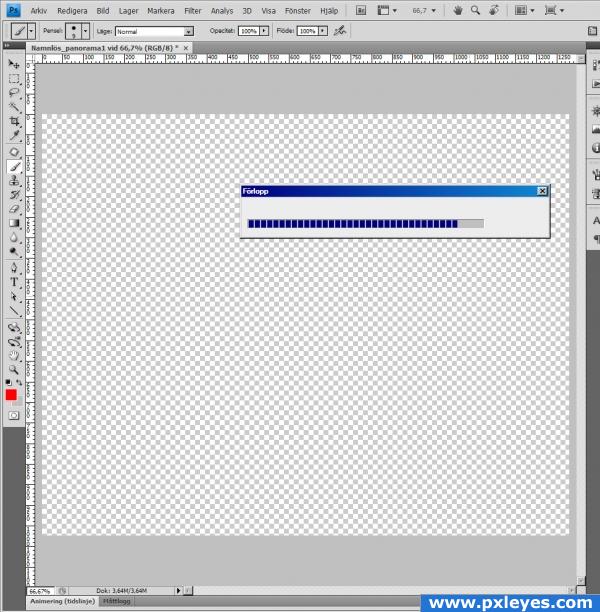
Step 5
This will take some time (a lot if you have a slow/busy computer or a panorama that is hard to make for Photoshop) So don’t try this at home (if you are busy or don’t have time)
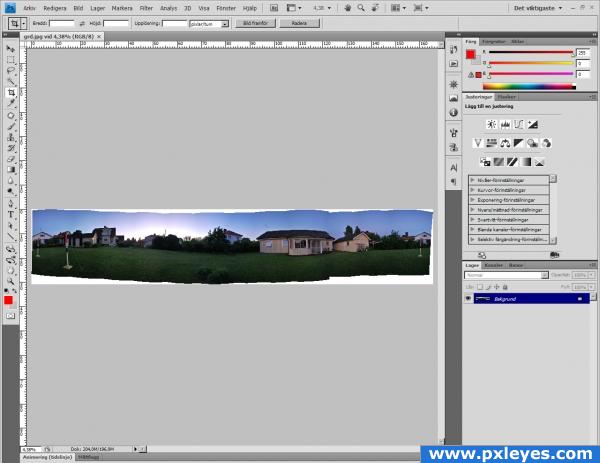
Step 6
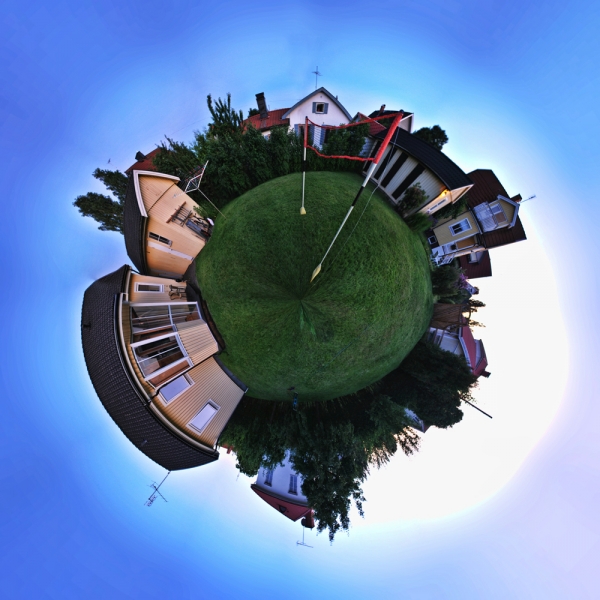
This is what you should come up with. (There will be separate layers and layer masks for every single image.) I merged them though.
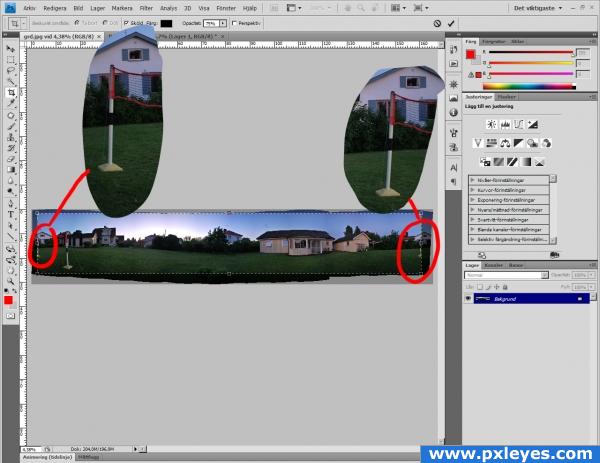
Step 7
Now you have to crop the panorama into only a 360 degree one, or else you end result will look like…crap… If you have a panorama that is less then 360 degrees make sure the start and end of the image looks the same and fits “into” each other.
Step 8
Now you’ll open “image size” image -> imagesize (or Ctrl+alt+i)
Make sure “keep proportions” are unchecked. Then insert the height number into the length one. This will give you a complete squared image (that looks like crap)

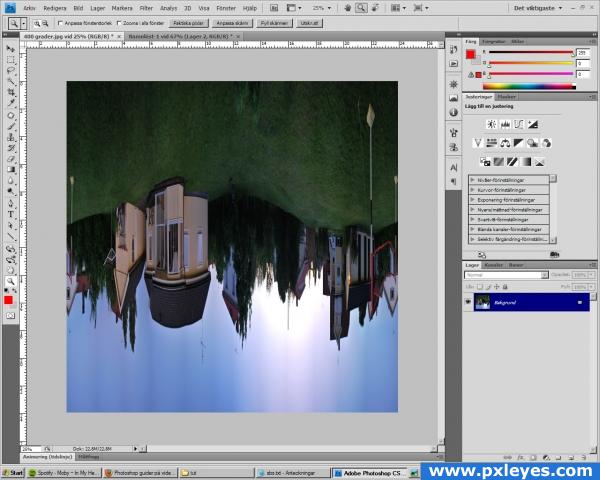
Step 9
Now rotate the image 180 degrees, image-> image rotation -> 180. You’ll now have an crappy looking upside down image. So get ready for magic.
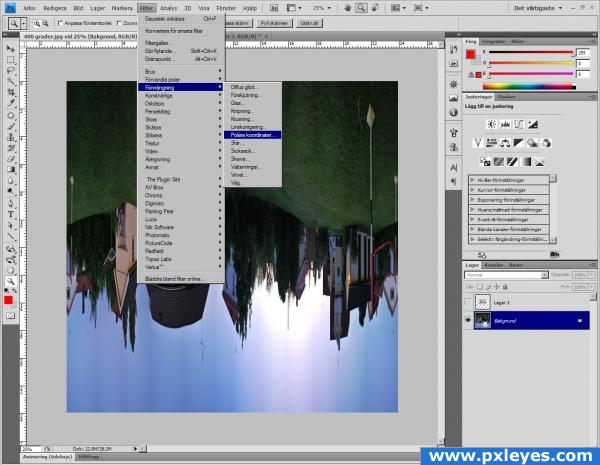
Step 10
The magic comes when you play around with the image coordinates (it sounds more fancy then it really is)
This is made by going into filters -> distortion -> polar coordinates.
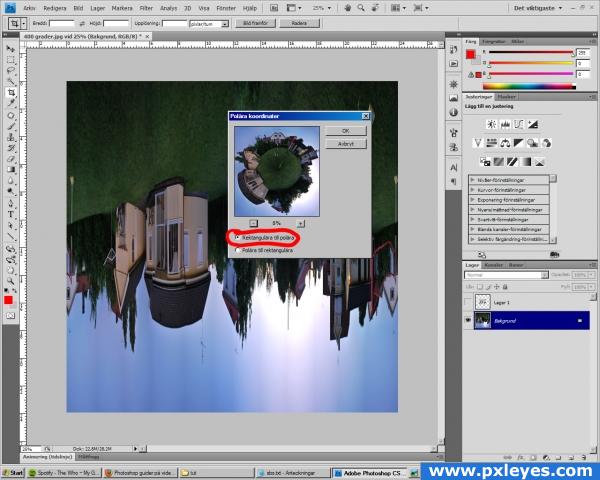
Step 11
Make sure “rectangular to polar” is checked. Then hit OK and BOOM!
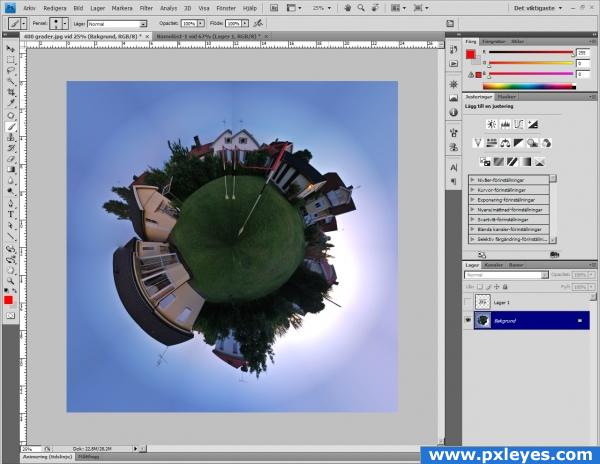
Step 12
Welcome to my world :)
Step 13
This is what i came up with after some cloning work and color corrections.
Try it out and show me your results! Good luck!